How to
Business Central


Improve your performance in 3 steps with a clean database
07 Oct 2021
4 min read
A user-friendly, fast software application is indispensable for your organization. But the longer you use a software application, the larger the database becomes. Every action you perform is equal to X number of bytes and can impact the performance of the software. At our support department, we sometimes receive questions about ‘the performance’ of our software. What actions can you take yourself to improve speed? In this blog, I share 3 steps that help you get the first profit.
Step 1: Minimize data storage
With each action, you retrieve information and store new information. Suppose your organization has been working with 3PL Dynamics for three years, and with every action you perform, the application has to analyze the data over the past years. But activities may have been open for months without you or your colleagues being aware of this. Activities that are no longer relevant but do consume data. Therefore, be critical about how long you want to store information and run through your tables periodically.
Tip: Keep tables of operational documents/records as small as possible. Ask the following control questions:
- Do we clean up the batch content table (correctly) after a billing run?
- Do we transfer documents once they are completed?
- Are outstanding warehouse activities still up to date?
- How many scan sessions are logged in 3PL Dynamics?
Step 2: Book documents automatically
Practice shows that files/documents are often open for a longer period for various reasons. Example: A case is handled, set to a new/next status, and then the system waits for the case/document to be posted by you or your colleague. What can you do to automate this process (further)? Follow the step-by-step plan below to automatically post your documents:
- Add a status ‘**-Book’, for example ’65-Book’
- Add function ‘120’ to this state transition
- This function comes from the ‘11154680 library’ and you set it up after the status change
- In the parameters, you choose only the parameter ‘post’
- Create a job queue entry:
- Select “Job No. 26′
- Click on the 3 dots next to the ‘Function Set’ field
- Select the function code ‘Change Status’
- In the parameters, you can enter the table number
Tip: Use 11154660 for WMS documents
- Apply the table filters here
- What document types can the job queue entry pick up
- From what status can the document proceed to status **-book
- At NEW Status you indicate the newly created status in **-book
- Schedule the job queue entry at the desired times
- When the job queue entry is executed, the documents are posted automatically.
Step 3: Use the cleanup settings
Sometimes things are so obvious that we tend to forget them. For example, periodically cleaning your application. Addresses can no longer be used, but they will remain in your database. Clean your database (periodically) with the cleanup settings in Business Central or perform a periodic cleanup with job queue entries.
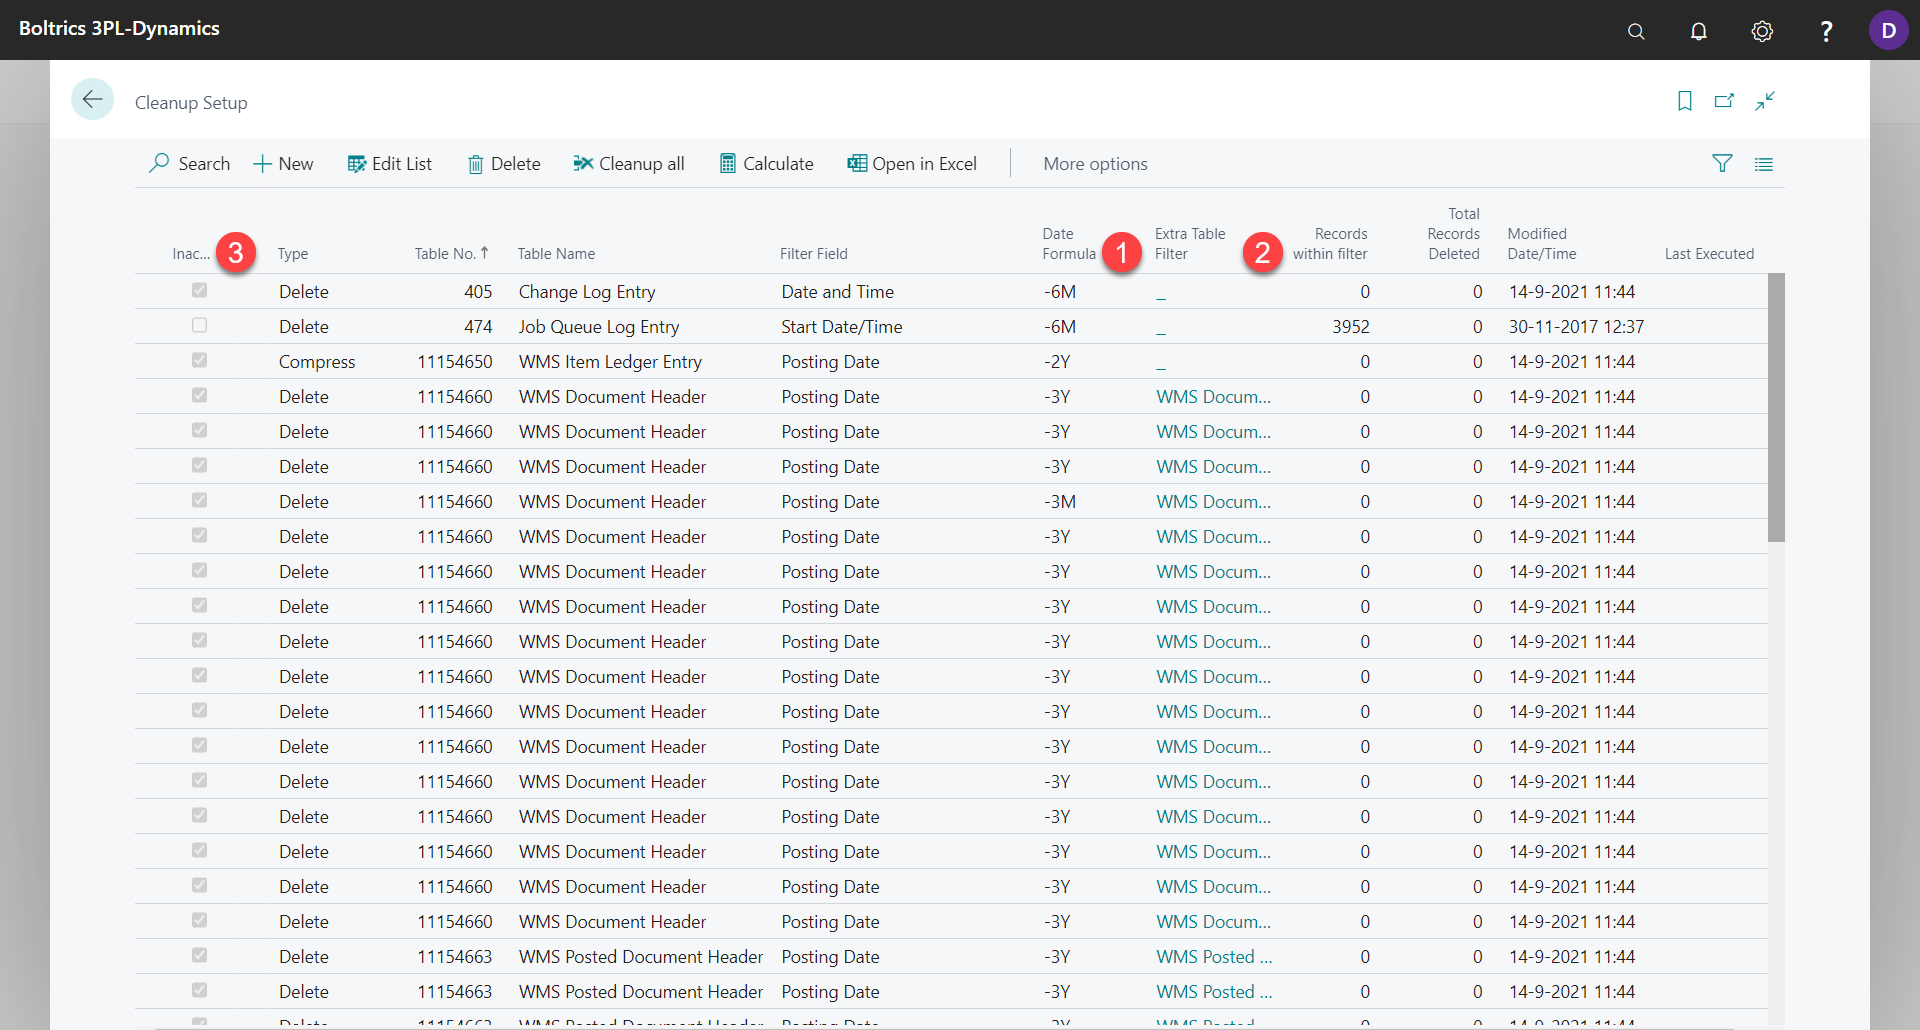
1. Go to the Cleanup Setup
By default, there are several predefined settings. You can activate or change this (date filter or extra table filter). You can also add an extra line. For example, remove one-time addresses.
2. Go to the Job Queue Entries
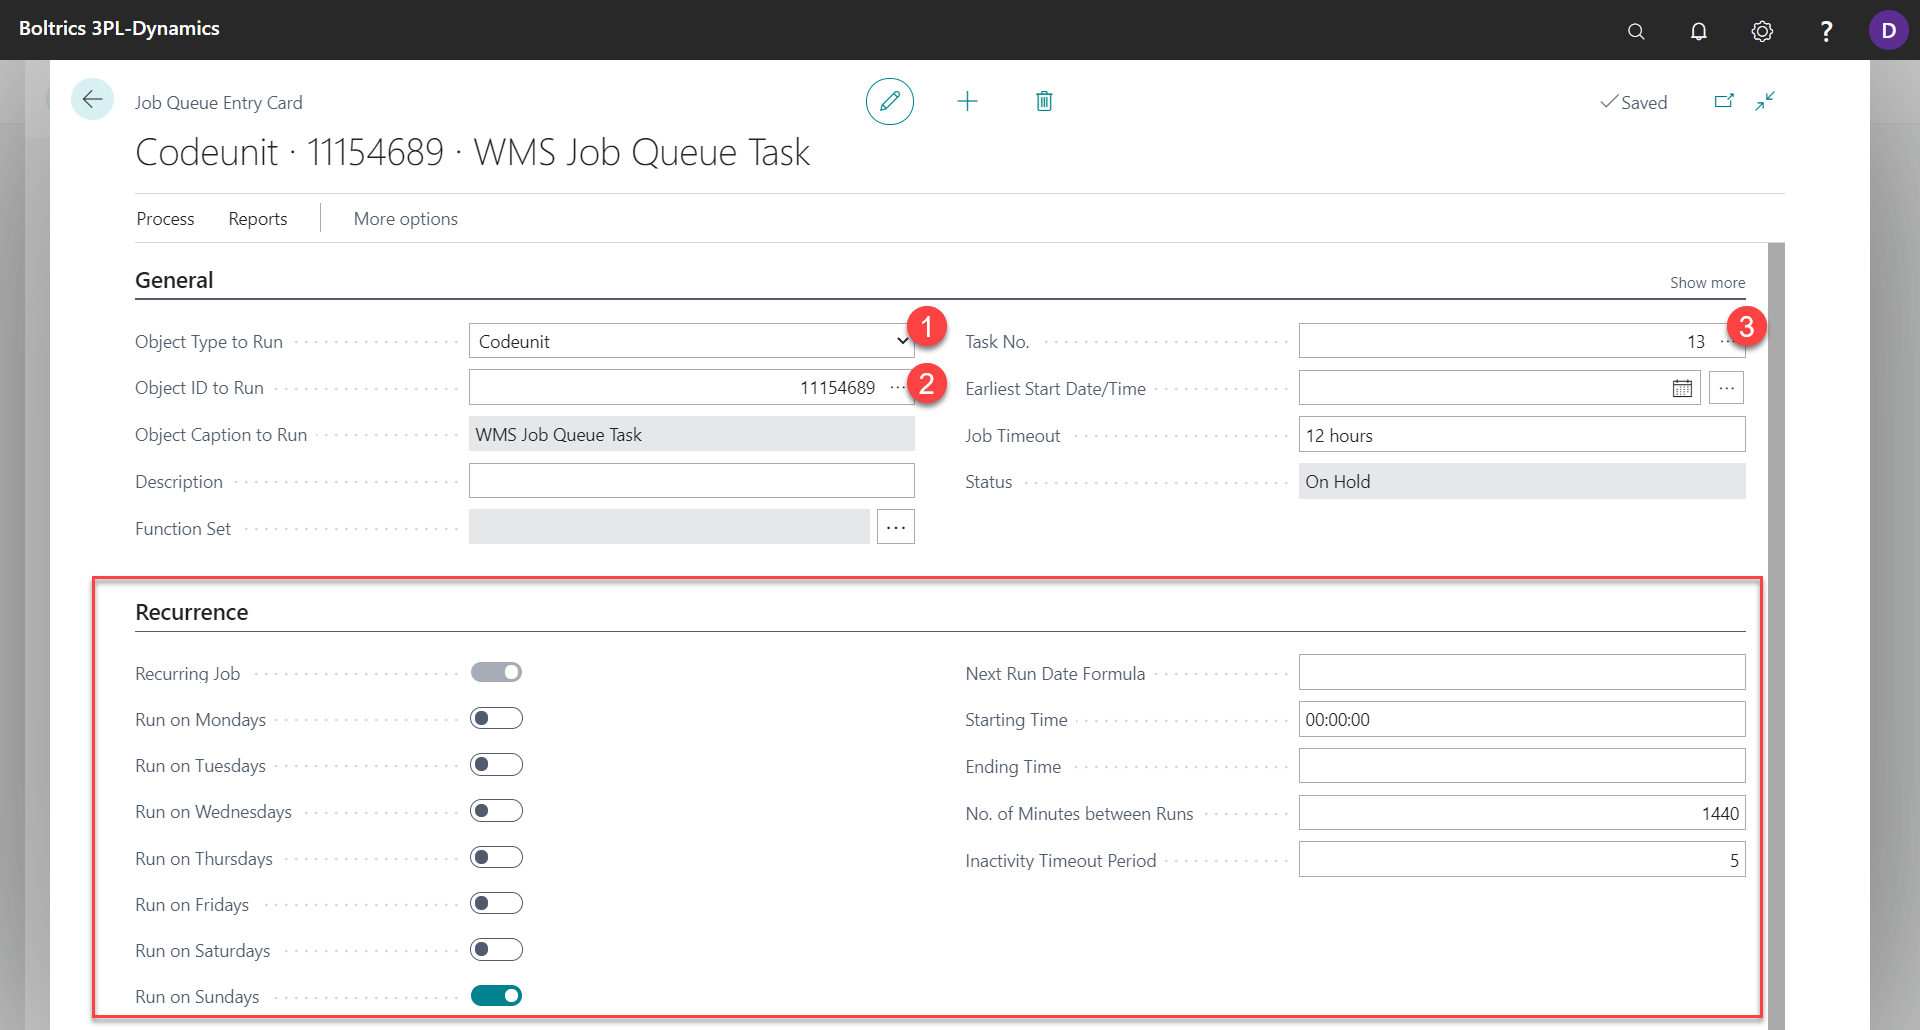
- Open job queue entry with job no. 13.
Doesn’t this job queue entry exist in your environment yet? Then create it by using the steps mentioned in blue below. - Set the task to wait and schedule the cleanup when there are few or no transactions. For example, at night and only on Saturdays.
Note: If the task has never been performed, the first time will take longer.
Create Job Queue Entry 13
- Use the search bar to navigate to ‘Job Queue Entries’
- Click on ‘New’
- Select Codeunit at ‘Object Type to Run’
- Enter 11154689 at ‘Object ID to Run’
- Enter 13 at ‘Task No.’
- When recurring, select the day and enter the starting time
- In the ribbon, choose the action ‘Set status to Ready’
- The job queue entry is scheduled.